Getting Started
FPVGate is an RSSI-based lap timing solution for FPV drones. It measures lap times by detecting your drone's video transmitter signal strength as you fly through the gate.
Option 1: FPVGate AIO (Easiest)
The FPVGate AIO is a prebuilt all-in-one board with everything included. No soldering or wiring required. Purchase from the FPVGate Shop.
Option 2: Build Your Own
- Seeed Studio XIAO ESP32S3 (Recommended) or ESP32-S3 DevKitC-1
- RX5808 Module (SPI modded)
- MicroSD Card (FAT32, 1GB+)
- 5V Power Supply (USB power or any 5V source)
- WS2812 RGB LEDs (optional)
- Active Buzzer (optional)
Hardware Setup
FPVGate AIO
If you have the FPVGate AIO prebuilt board, no wiring is needed. Simply flash the firmware and insert an SD card to get started. Get one from the Shop.
Building your own? FPVGate supports multiple ESP32 boards. Select your board below to see the wiring diagram:
Note on ESP32-S3 Super Mini
Through testing, the ESP32-S3 Super Mini has proven unreliable due to inconsistent board quality from various suppliers. Some revisions experience frequent brownouts under load. This board is still available under Expert Mode in the flasher, but is not recommended for new builds.
Important
The RX5808 module must be SPI modded to work with FPVGate. See the SPI mod guide.
Flashing Firmware
Use our web-based flasher for the easiest installation experience. No command line required!
Connect Your Device
Connect your ESP32-S3 to your computer via USB. Use Chrome, Edge, or Opera browser.
Select Board & Version
Choose your board type and the firmware version you want to install.
Flash
Click "Connect & Flash Device" and wait 2-3 minutes for the process to complete.
SD Card Setup
FPVGate uses an SD card to store voice announcement files and race data. Setting up the SD card correctly is essential for audio features.
SD Card Requirements
- Format: FAT32
- Size: 1GB - 32GB recommended
- Speed: Class 10 or higher for best performance
Automatic Setup (Recommended)
Use the SD Card Setup tool on the Flasher page to automatically download and extract the correct folder structure to your SD card:
- Insert your FAT32-formatted SD card into your computer
- Go to the Web Flasher page
- Find the "SD Card Setup" section in the sidebar
- Select your firmware version
- Click "Select SD Card & Setup" and choose your SD card folder
- The tool will download and extract all required files automatically
Manual Setup
Alternatively, you can manually set up the SD card:
- Download the
SD_Card.zipfrom the GitHub releases page - Extract the contents to the root of your SD card
- Ensure the folder structure matches the expected layout (audio files in the correct directories)
Important
Make sure to use the SD_Card.zip that matches your firmware version. Each release may have different audio files or folder structures.
Configuration
After flashing, connect to the FPVGate WiFi network and access the web interface.
First-Time Setup
- Connect to WiFi network:
FPVGate(v1.6.1+) orFPVGate_XXXX - Password:
fpvgate1 - Open browser to:
http://fpvgate.local(all devices now use this simplified hostname) - Go to Configuration → Set your VTx frequency
- Configure LED settings (if using RGB LEDs)
- Set up voice announcements (optional)
- Choose a theme in Settings (v1.5.7+)
- Configure battery monitoring if using a voltage divider (v1.5.6+)
- Adjust audio volume controls for beeps and announcements (v1.6.0+)
- iOS Safari is fully supported with improved hostname handling (v1.6.1+)
Calibration
Proper calibration is essential for accurate lap detection.
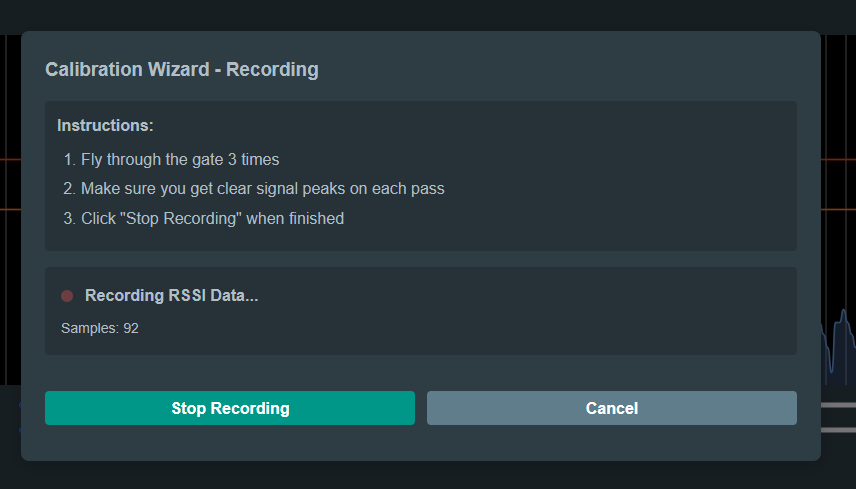
Calibration Wizard
FPVGate includes a guided calibration wizard that helps you set optimal RSSI thresholds:
- Place your drone at the gate
- Start the calibration wizard
- Move the drone through the gate several times
- The wizard will automatically calculate optimal thresholds
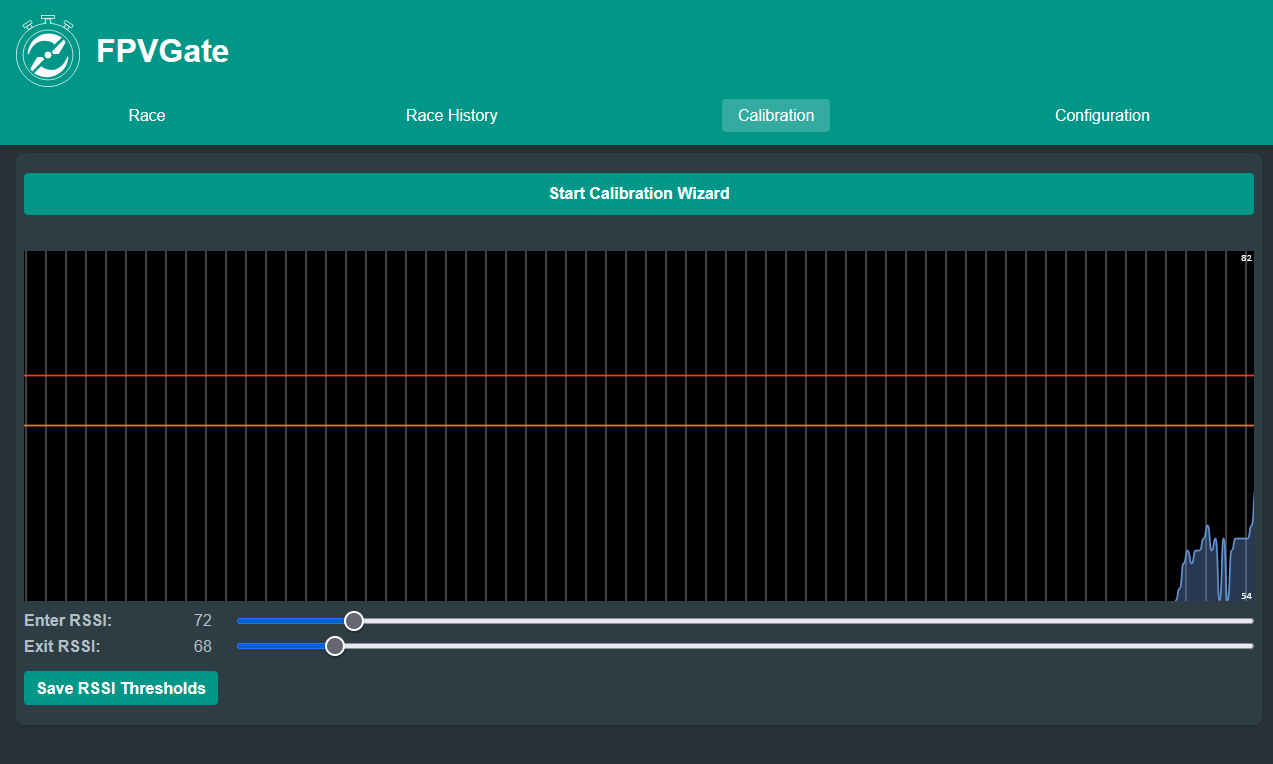
Manual Calibration
You can also manually set thresholds:
- Enter Threshold: RSSI level when crossing starts
- Exit Threshold: RSSI level when crossing ends
- Peak Detection: RSSI must peak between enter and exit
Using the Lap Timer
Starting a Race
- Ensure calibration is complete
- Power on your drone
- Click "Start Race" on the web interface
- Fly through the gate - laps will be recorded automatically
- Click "Stop Race" when finished
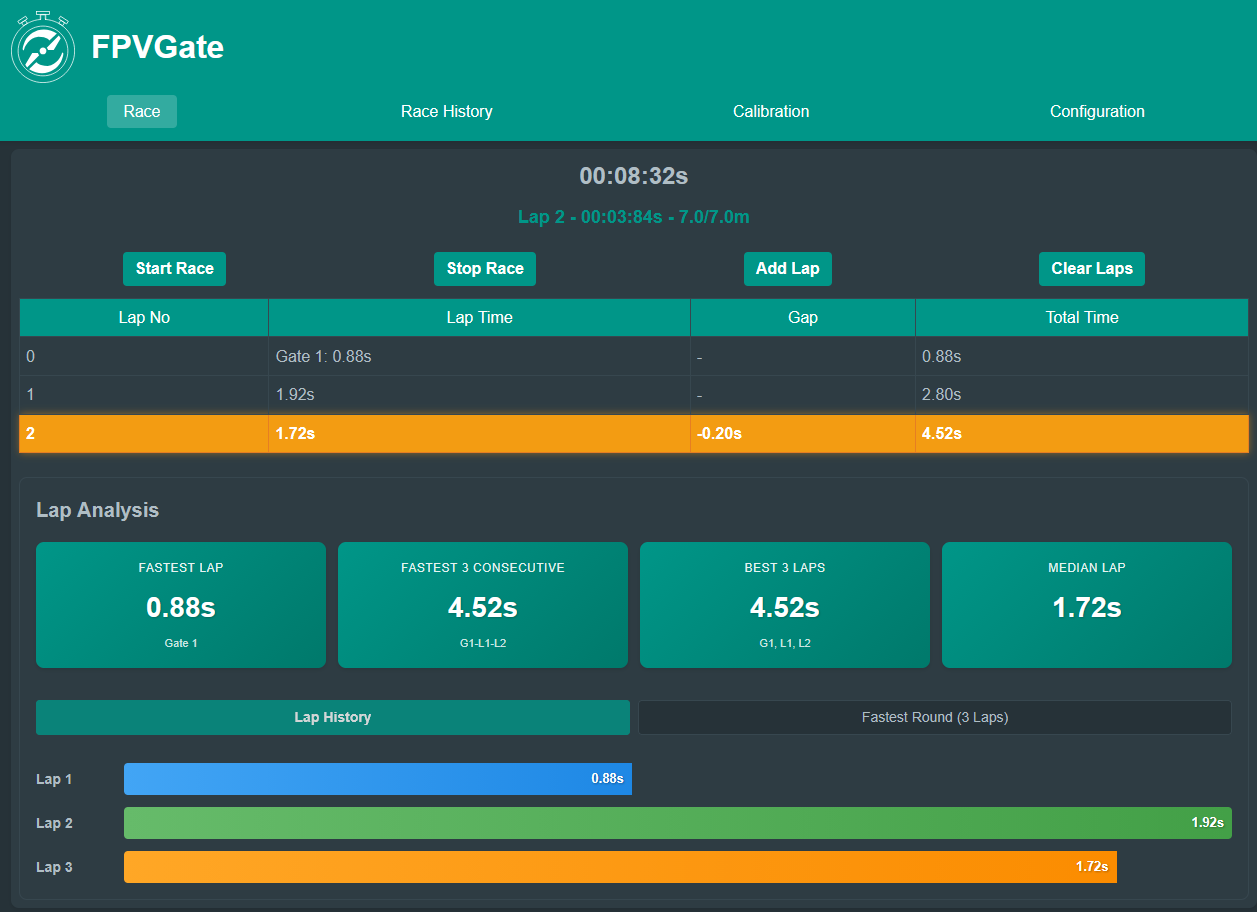
Features During Race
- Real-time lap display
- Fastest lap highlighting
- Gap analysis
- Voice announcements for each lap
- LED feedback (if configured)
- On-screen displays (OSD) for live stats
Multi-Timer Race Sync
FPVGate v1.6.1 brings powerful multi-pilot racing capabilities. See the Multi-Pilot Setup section for detailed instructions.
After Race
- View race statistics
- Export race data
- Compare with previous sessions
- Edit laps if needed (Marshalling Mode)
Multi-Pilot Setup
FPVGate supports synchronizing multiple timers for multi-pilot racing. Each pilot has their own FPVGate device, and one device acts as the Master to control the race.
Sync Modes
- Personal Mode (default) - Single pilot timing, no sync required
- Master Mode - Controls race start/stop, receives all pilots' lap data, shows multi-pilot comparison view
- Slave Mode - Follows Master's commands, sends lap times to Master automatically
Step 1: Connect All Devices to Same Network
All FPVGate devices must be on the same WiFi network:
- Option A: Connect all devices to your home/external WiFi network via Configuration → WiFi & Connection
- Option B: Keep one device in AP mode (FPVGate network), connect all other devices and your phone to that network
Step 2: Add Sync Devices (on Master)
- Go to Configuration → WiFi & Connection → Race Synchronization
- Find the "Add Device" input field
- Enter each slave device's IP address (e.g.,
192.168.4.100) - Click "Add Device" - it will appear in the sync devices list
Step 3: Set Device Roles
For each device in the list:
- This Device: Set to "Master" on the controlling timer
- Other Devices: Set to "Slave"
Role options: Personal (solo timing), Master (controls race), Slave (follows master), RotorHazard (syncs with RH server - see RotorHazard Integration)
Step 4: Test Connections
Click "Test All Connections" to verify all devices can communicate:
- Green checkmark = Ready to race
- Red X = Check network connectivity
Racing in Multi-Pilot Mode
Once configured:
- Start/Stop race from the Master device only - all slaves sync automatically
- Each pilot's laps appear side-by-side in the Master's race view
- Lap Times Chart and Consistency Chart compare all pilots
- Voice announcements include all pilots' lap times
- Race history saves complete multi-pilot data
Troubleshooting Multi-Pilot
- Devices not connecting: Ensure all on same network subnet, check firewall allows port 80
- Lap times not showing: Confirm slave is set to "Slave" role and master's IP is correct
- Race not syncing: Master must be set to "Master" role, test connections first
RotorHazard Integration
FPVGate v1.7.0+ can operate as an external RSSI node for RotorHazard, enabling bidirectional race control and lap submission.
Requirements
- FPVGate firmware v1.7.0 or later
- RotorHazard 4.x (tested on 4.4.0+)
- FPVGate and RotorHazard on the same local network
- The FPVGate RH Plugin installed on the RH server
How It Works
- FPVGate to RH: Gate crossings are submitted as laps; race start/stop commands are forwarded
- RH to FPVGate: RotorHazard race events (stage, start, stop) are relayed back to control FPVGate
- Clock Sync: NTP-style synchronization keeps timing aligned between both systems
Setup Steps
Install the RH Plugin
Clone the fpvgate-rh-plugin into your RotorHazard plugins/ directory and restart the server.
Connect to Network
Set FPVGate to Station mode (WiFi & Connection settings) so it joins the same network as the RH server.
Enable RotorHazard Mode
In Sync settings, set this device's role to RotorHazard. Enter the RH Host IP and select the node seat (0-7).
Verify & Sync
Click Refresh to check the connection status, then Sync Now to synchronize clocks. RTT under 10ms is ideal.
For full technical details, endpoint reference, and troubleshooting, see the complete RotorHazard Integration guide.
Screenshots
Race Screen
Real-time lap display with fastest lap highlighting and gap analysis
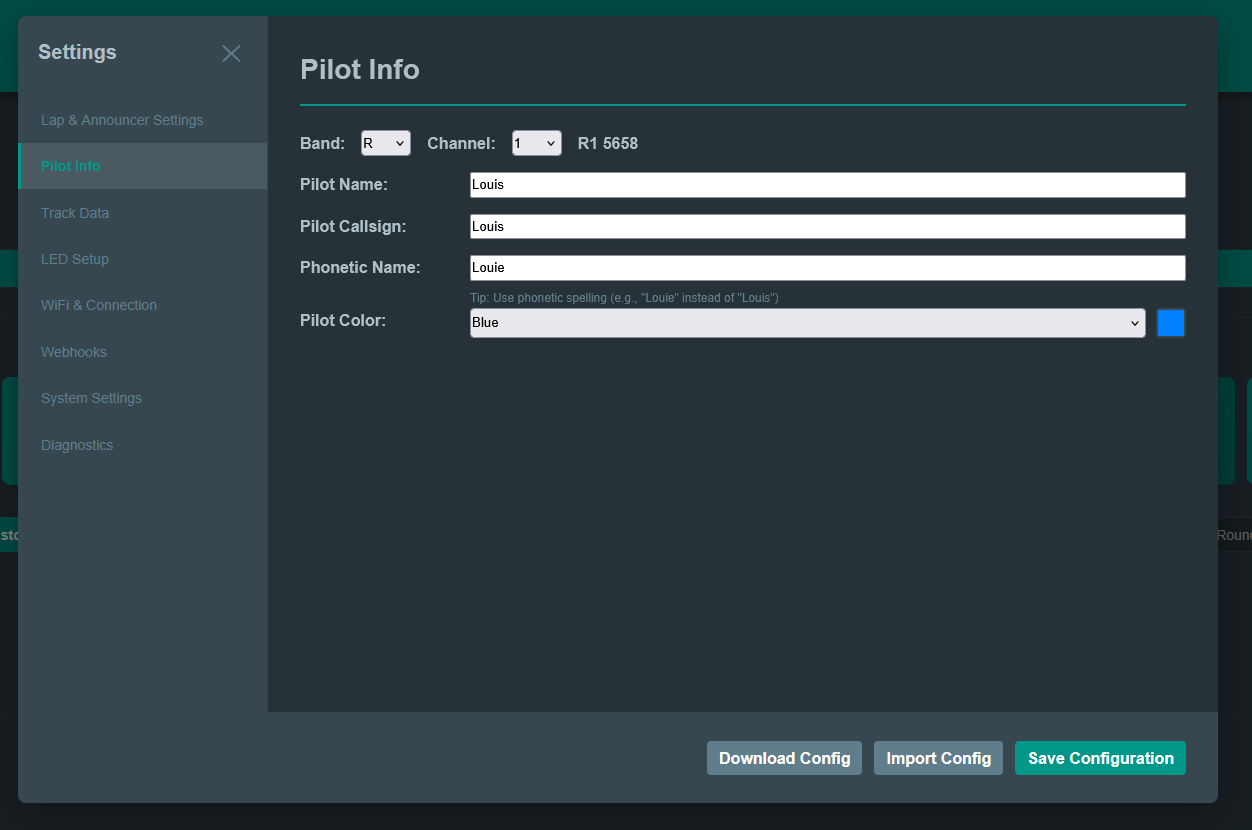
Configuration - Pilot Info
Configure your pilot details and preferences
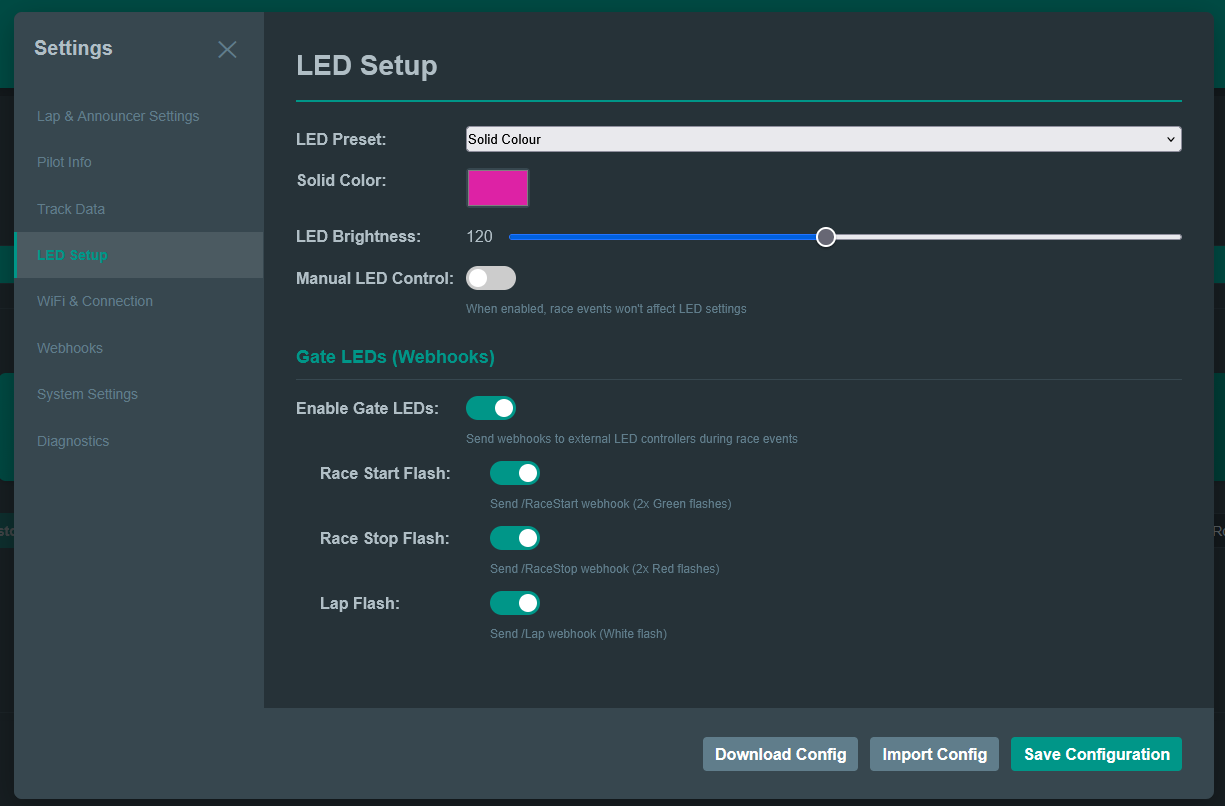
Configuration - LED Setup
Customize LED behavior and colors
Calibration Wizard
Guided calibration process for optimal lap detection
Calibration Screen
Real-time RSSI visualization and threshold adjustment
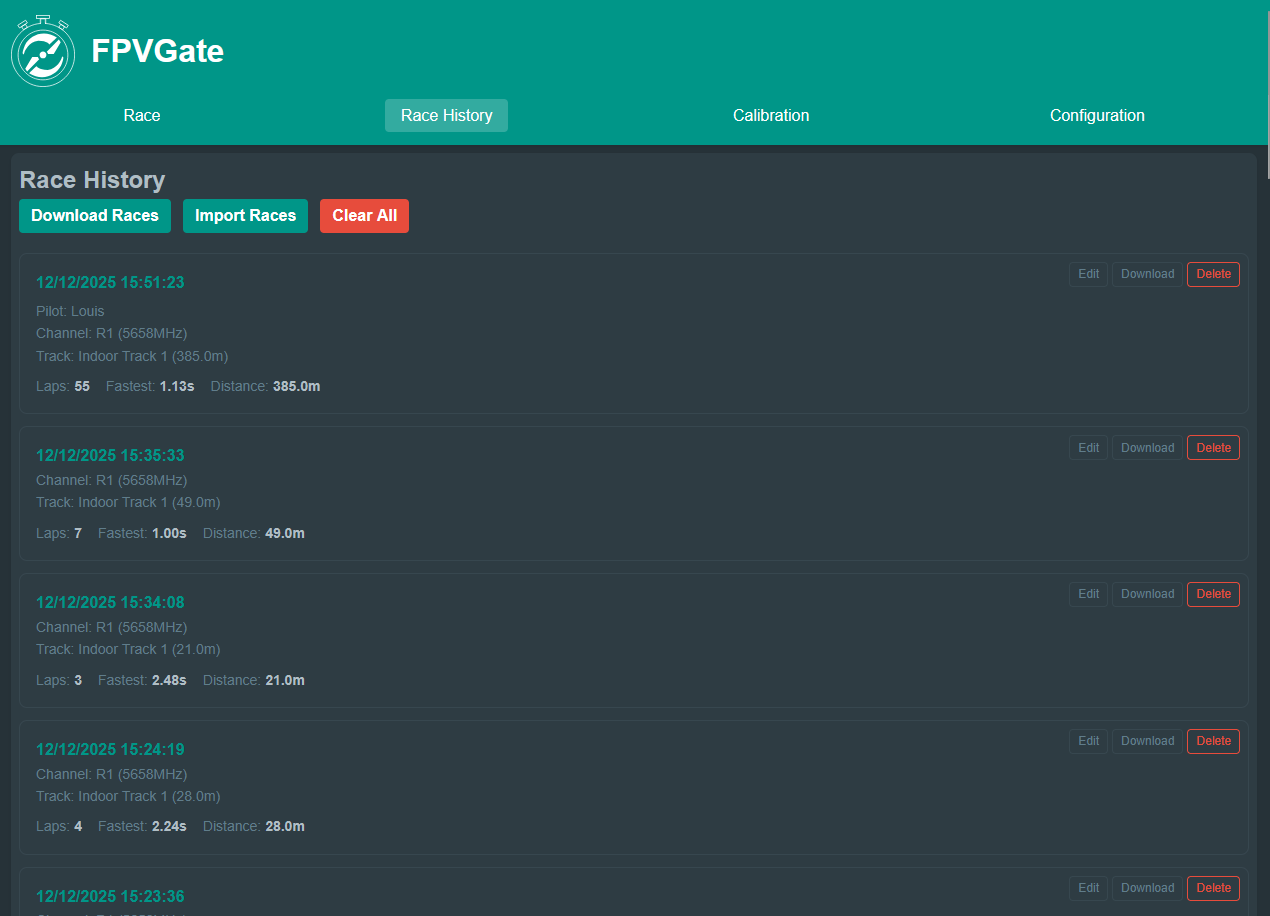
Race History
Detailed analysis of all your races
Troubleshooting
Can't connect to WiFi
- Wait 30 seconds after boot for AP to start
- Check serial monitor for errors
- Verify firmware flashed correctly
No lap detection
- Verify RX5808 is SPI modded
- Check VTx frequency matches configuration
- Re-run calibration wizard
- Ensure drone is powered on
False lap detections
- Increase enter/exit thresholds
- Move gate farther from flight area
- Reduce transmitter power if too strong
Starting beep not playing (Mobile/iOS)
- Check silent mode: Your phone must NOT be on silent mode
- iOS: Make sure the silent switch is off
- Android: Ensure media volume is not muted
- The race countdown tone requires your device's ringer/media volume to be enabled
No audio announcements
- Verify SD card is FAT32 formatted
- Check SD card contents match required structure
- Try different SD card
- Check audio files in Configuration menu
Voice announcements not working on iOS Safari
- Enable audio first: Go to Configuration → TTS Settings and click "Enable Voice"
- Test the voice: Click "Test Voice" to trigger audio permission - this is required on iOS Safari
- iOS Safari requires user interaction before audio can play - the Enable/Test buttons provide this
- Make sure your device is not on silent mode (check the physical mute switch)
- If still not working, try refreshing the page and repeating the Enable → Test sequence